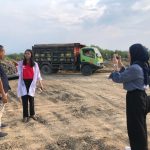
Installing a Geotextile Box in construction projects can be tricky, but it’s crucial for stability and efficiencies in architecture. Unlike traditional methods, using a Geobox (Geotextile Box) ensures better load distribution and reduces soil erosion. This guide will walk you through the steps to effectively install a Geobox, helping you avoid common pitfalls with projectors, media player, and resolution, ensuring a smooth project delivery method. Whether you’re a seasoned pro or new to construction, these project tips will make the process smoother and more successful.
Understanding GeoBox
Hardware Design
GeoBox is compatible with a wide range of playback devices, supporting various pixel resolutions for any project. This makes it ideal for various construction project applications. Choosing hardware that supports 24/7 operation is crucial. It ensures reliability in proAV setups.
GeoBox’s hardware-centric design offers seamless content display across multiple projectors with pixel-perfect resolution. This feature is essential for large-scale projects needing precise image alignment and resolution.
Functionality
GeoBox’s geometric alignment feature reshapes images to fit targeted display areas without distortion for your project. This ensures that the visuals are clear and accurate.
Calculating optimal signal resolution is vital for GeoBox installations. It achieves clear image quality by adjusting project settings based on the display requirements.
GeoBox offers flexibility in source switching. It can handle simultaneous playback from multiple sources, making it versatile for different project tasks.
Resilience Benefits
GeoBox’s hardware design contributes to its durability and reliability. It performs well in demanding construction environments.
A hardware-based solution like GeoBox maintains performance stability. It optimizes specific tasks, ensuring consistent results.
GeoBox can operate continuously. This capability ensures uninterrupted content delivery during critical project phases.
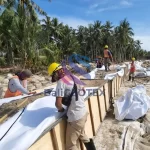
![Geobox merk BALIGEOTEX[1]](https://indonesiageotextilefabric.com/wp-content/uploads/2025/02/Geobox-1_11zon.webp "Geobox merk BALIGEOTEX[1]")
Preparing for Installation
Site Analysis
Assess the site for optimal GeoBox placement. Consider the viewing distance and angle. This ensures clear visibility for all viewers.
Evaluate environmental factors that may affect installation. Factors like lighting, temperature, and humidity are crucial. These can impact the performance of GeoBox.
Site analysis helps in determining necessary adjustments. Adjustments for pixel pitch and image clarity are essential. Proper evaluation ensures high-quality display.
Material Preparation
Prepare project content with the correct aspect ratio, resolution, and pixel pitch. This is vital for a seamless GeoBox installation.
Select the right playback device based on content complexity. Devices like desktop PCs may be used for versatile project content. Ensure compatibility with GeoBox.
Test the content on GeoBox before final installation. This ensures compatibility and seamless display. Any issues can be addressed beforehand.
Safety Measures
Implement safety protocols during GeoBox installation. Protect workers and equipment from potential hazards.
Ensure proper electrical safety measures when setting up GeoBox. Check all connections and plugs to prevent electrical mishaps.
Take precautions to prevent damage to GeoBox and other project materials. Handle all components carefully during installation.
Step-by-Step Installation Guide
Planning Tasks
Creating a detailed installation plan is crucial. It should include project timelines, resource allocation, and content preparation steps. This ensures that every aspect of the project is accounted for.
Coordinate with other construction tasks to minimize disruptions. Aligning schedules can prevent delays and conflicts on-site.
Contingency planning is necessary. Anticipate potential challenges during GeoBox installation. Prepare solutions in advance to avoid setbacks.
Executing Installation
Follow a step-by-step process for installing GeoBox. Start by mounting the hardware securely. Then, configure settings for optimal display.
Adhere to manufacturer guidelines and best practices. This ensures the device’s integrity and functionality.
Technical expertise is essential. Troubleshoot and adjust settings during installation. This guarantees that the system operates correctly.
Quality Control
Conduct quality checks on GeoBox installations. Ensure all components function correctly before finalizing the setup.
Verify content display quality. Check resolution, color accuracy, and alignment to ensure high project standards.
Regular maintenance checks are important. They sustain the performance and longevity of GeoBox installations.

Enhancing Project Success
Effective Communication
Clear and consistent communication is vital. The installation team, project managers, and stakeholders must stay aligned. This ensures everyone understands the project goals, timelines, and expectations.
Effective communication helps resolve issues promptly. During the GeoBox installation process, quick responses to project problems are crucial. This keeps the project on track and avoids delays.
Leveraging Technology
Integrating GeoBox with other technological tools offers many advantages. Using software for project management enhances execution efficiency. Remote monitoring and control of GeoBox project installations save time and resources.
Staying updated on new features and updates is essential. Maximizing the utility of GeoBox requires knowledge of the latest advancements. This ensures that the construction projects benefit fully from the technology.
Workplace Culture
Fostering a culture of innovation and continuous learning is important. Encouraging the team to explore new methods optimizes the GeoBox installation process. A positive workplace culture boosts collaboration and problem-solving skills.
Leadership plays a key role in promoting safety, quality, and efficiency. Emphasizing these core values during GeoBox installation leads to better outcomes. A strong workplace culture directly impacts project success.
Maintenance and Management
Simplified Maintenance
Conducting routine maintenance on GeoBox involves several steps. First, inspect the device for any visible damage. Second, clean the exterior to remove dirt and debris. Third, check and tighten any loose connections. Fourth, update the software regularly to ensure optimal performance.
Training staff on maintenance procedures is crucial. Proper training prevents downtime and extends the lifespan of the device. Staff should know how to identify issues early and perform basic fixes.
A simplified maintenance approach reduces overall project costs. It improves reliability by ensuring that GeoBox operates efficiently. Regular maintenance also prevents costly repairs.
Site Management Tips
Managing the construction site effectively is essential for GeoBox installation. Allocate sufficient space for the device. Ensure easy access for maintenance personnel.
Minimizing disruption to ongoing activities is important. Schedule installation during off-peak hours if possible. Use barriers to separate the installation area from active work zones.
Documentation is key for successful management. Keep detailed records of all installation and maintenance activities. This helps track resource allocation and identify recurring issues.
Summary
You’ve now got a solid understanding of GeoBox, how to prepare for its installation, and the step-by-step guide to get it done right. You’ve also learned how to enhance project success and manage ongoing maintenance. By following these guidelines, you’re setting yourself up for a smoother, more efficient construction project.
Ready to take your construction projects to the next level? Start implementing these techniques today and see the difference GeoBox can make. For more information about Geobox, please contact Whatsapp/Mobile Phone: +62 817 391 338 (Imel). or Email: info@baligeotex.com